Tuesday, June 28, 2011

Let Freedom Ring!

With Independence Day just around the corner,
I wanted to share with you my decor for the holiday.
I enjoy making my space unique by incorporating seasonal/holiday decor and colors. 

Take a peek:


Custom made ribbon wreath (by me!) in red, white, and blue on my front door


Garden American flag


Chalkboard plate (tutorial previously posted) with "stars and stripes"


Everyday wreath's customized with metal/wood holiday signs


Star fillers in hurricane vases


Star picks in everyday flowering bushes


Bowl fillers ordered custom directly from Old Goat Primitives
Visit her Etsy shop for primitive bowl fillers for every occasion!


"America" banner ordered with custom colors from ArmyMOMofTwins 
Visit her on Etsy for custom banners for every occasion!

I hope everyone has a great 4th of July weekend!

Friday, June 10, 2011

Do It Youself (And To Your Taste) Wall Decor

When it came time to decorate my bedroom, the thought of having a very large wall space to fill haunted me several times.  I just did not know how I wanted to fill the space.  I had seen several variations of the same type of project in blog land previously and always wanted to use the idea in my house in some way.  I decided that I would create my own variation for my bedroom.

Supplies:
Canvas
Scrapbook Paper
Spray Adhesive
Distress Ink


First, I used my distress ink and patted the edges of the canvas with a paper towel.


Then, I sprayed each canvas piece with the spray adhesive.


Once each piece has been sprayed, I place the pieces of scrapbook paper (be sure they are cut to fit prior to putting them on your canvas).  Smooth paper to be sure all wrinkles are removed.

Finished project:


This project can be completed specifically to meet your needs. Determine the size of canvas, number of canvas pieces, and color/combination of scrapbook pieces appropriate for your space and
Do It Yourself!
Be sure to come back and share your own wall decor projects with us!

Sunday, May 29, 2011

More Spray Paint...

Like I mentioned in my prior post, spray paint is an easy way to transform items.  Spray paint can also be a cost effective way of completely changing the look of something into one that fits your space.  I my case, I believe it changed my entire space.  When we purchased our home, much of the hardware was gold brass.  This look did not fit my taste/style. 

Before the transformation:


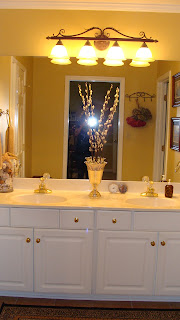
With the help of a can of oil rubbed bronze spray paint, I was able to transform my kitchen and master bathroom into rooms that fit my taste/style.


After the transformation:


Happy Memorial Day Weekend!  And Happy Transforming!  Hope to hear about some of your transformations soon!

Saturday, April 16, 2011

What A Little Spray Paint Can Do!

My husband and I purchased our first home in August of 2010.  With the move, I completely changed my decor style and colors.  The changes meant that many of my previous decor items would no longer work in my new home!  With the help and advice of a very great friend (Thanks, Rachel!), we began designing the decor and transforming many of my prior decor items so that they would work in our new space.  Many of the projects were possible with a little spray paint. 

Before:

After:

This lamp was maroon/gold prior to white spray paint.


The transformed wall art and lamp in the guest bedroom.


This cross was gold prior to being transformed with white spray paint.


I also had several items that meant something to me, however did not coordinate with my decor therefore had never been incorporated with my decor.  With a little spray paint, these items were also able to become part of our space.

My mom passed this flower pot along to me.  She received it following the loss of my Granddaddy and thought I may be able to put it to good use. 


With a little white spray paint, it now sits on my front porch and is a reminder of my Granddaddy! :)


This pitcher is one of the small treasures that was once my late Granny's.  I knew I would be able to incorporate it into my decor in some way.  


With a little spray paint, it now sits on my kitchen counter as a daily reminder of my Granny! :)


It is important when spray painting to purchase the type of spray paint appropriate for the material you are painting (believe me, I've learned from my mistakes!)

Happy spray painting and I hope to hear about some of your transformations!

Monday, March 28, 2011

More Chalkboard Projects!

Since completing my chalkboard plate, I have completed several more chalkboard projects that I wanted to share with you.  While browsing the aisles at Michael's one day, I ran across these self-stick chalkboard sheets that were reasonably priced.


I thought I could find some neat ways to put this item to good use.  The following are pictures of projects I completed using the sheets:


I attached a piece of the chalkboard sheet to a small piece of wood.  I then attached the piece of wood to a basket using twine.


I attached a sheet of the chalkboard to the glass in a picture frame.  I hot glued magnets to the back of the frame and hung it on the side of the refrigerator.


I attached pieces of the chalkboard sheets to my canisters.

Let me hear about your chalkboard projects!

Saturday, March 26, 2011

Chalkboard Plate

I have viewed many chalkboard projects in blogland and always wanted to complete one of my own; however I didn't know exactly what I wanted. I came across this plate that was stored away that has never been put to use and decided it would be perfect for my first chalkboard project!


Materials:
Platter or Plate of your choice
Spray Paint (if you wish to change the color of the plate)
Paintbrush
Chalkboard Paint
Painter's Tape (if you need to tape it off)
Chalk

First, I used white spray paint and covered the entire plate allowing it to completely dry prior to applying additional coats (it took several coats to cover the design).  When the spray paint was completely dry (you should probably wait 24 hours), I taped off the middle using painters tape.  I then painted the middle portion of the plate using chalkboard paint.  I purchased mine at a home improvement store.  It was a little pricey, so have several projects lined up so you can get your money's worth!


I used three coats of the chalkboard paint allowing each coat 24 hours to dry prior to applying an additional coat.  Now you are ready to prime your chalkboard.  To do this, take one piece of chalk (flat side) and rub over the entire surface, then erase. Now your chalkboard is ready to use!


I would love to see or hear about your chalkboard project too!